Introduction
The EndBOX is a retro minicomputer designed to run EndBASIC. You can read all about it in the unveiling.
There are no prebuilt machines for sale at this point, but you can build your own with the DIY instructions below. This page will tell you which specific components you need and will guide you through recording the OS disk image into an SD card ready for booting.
DIY Hardware
The standard model
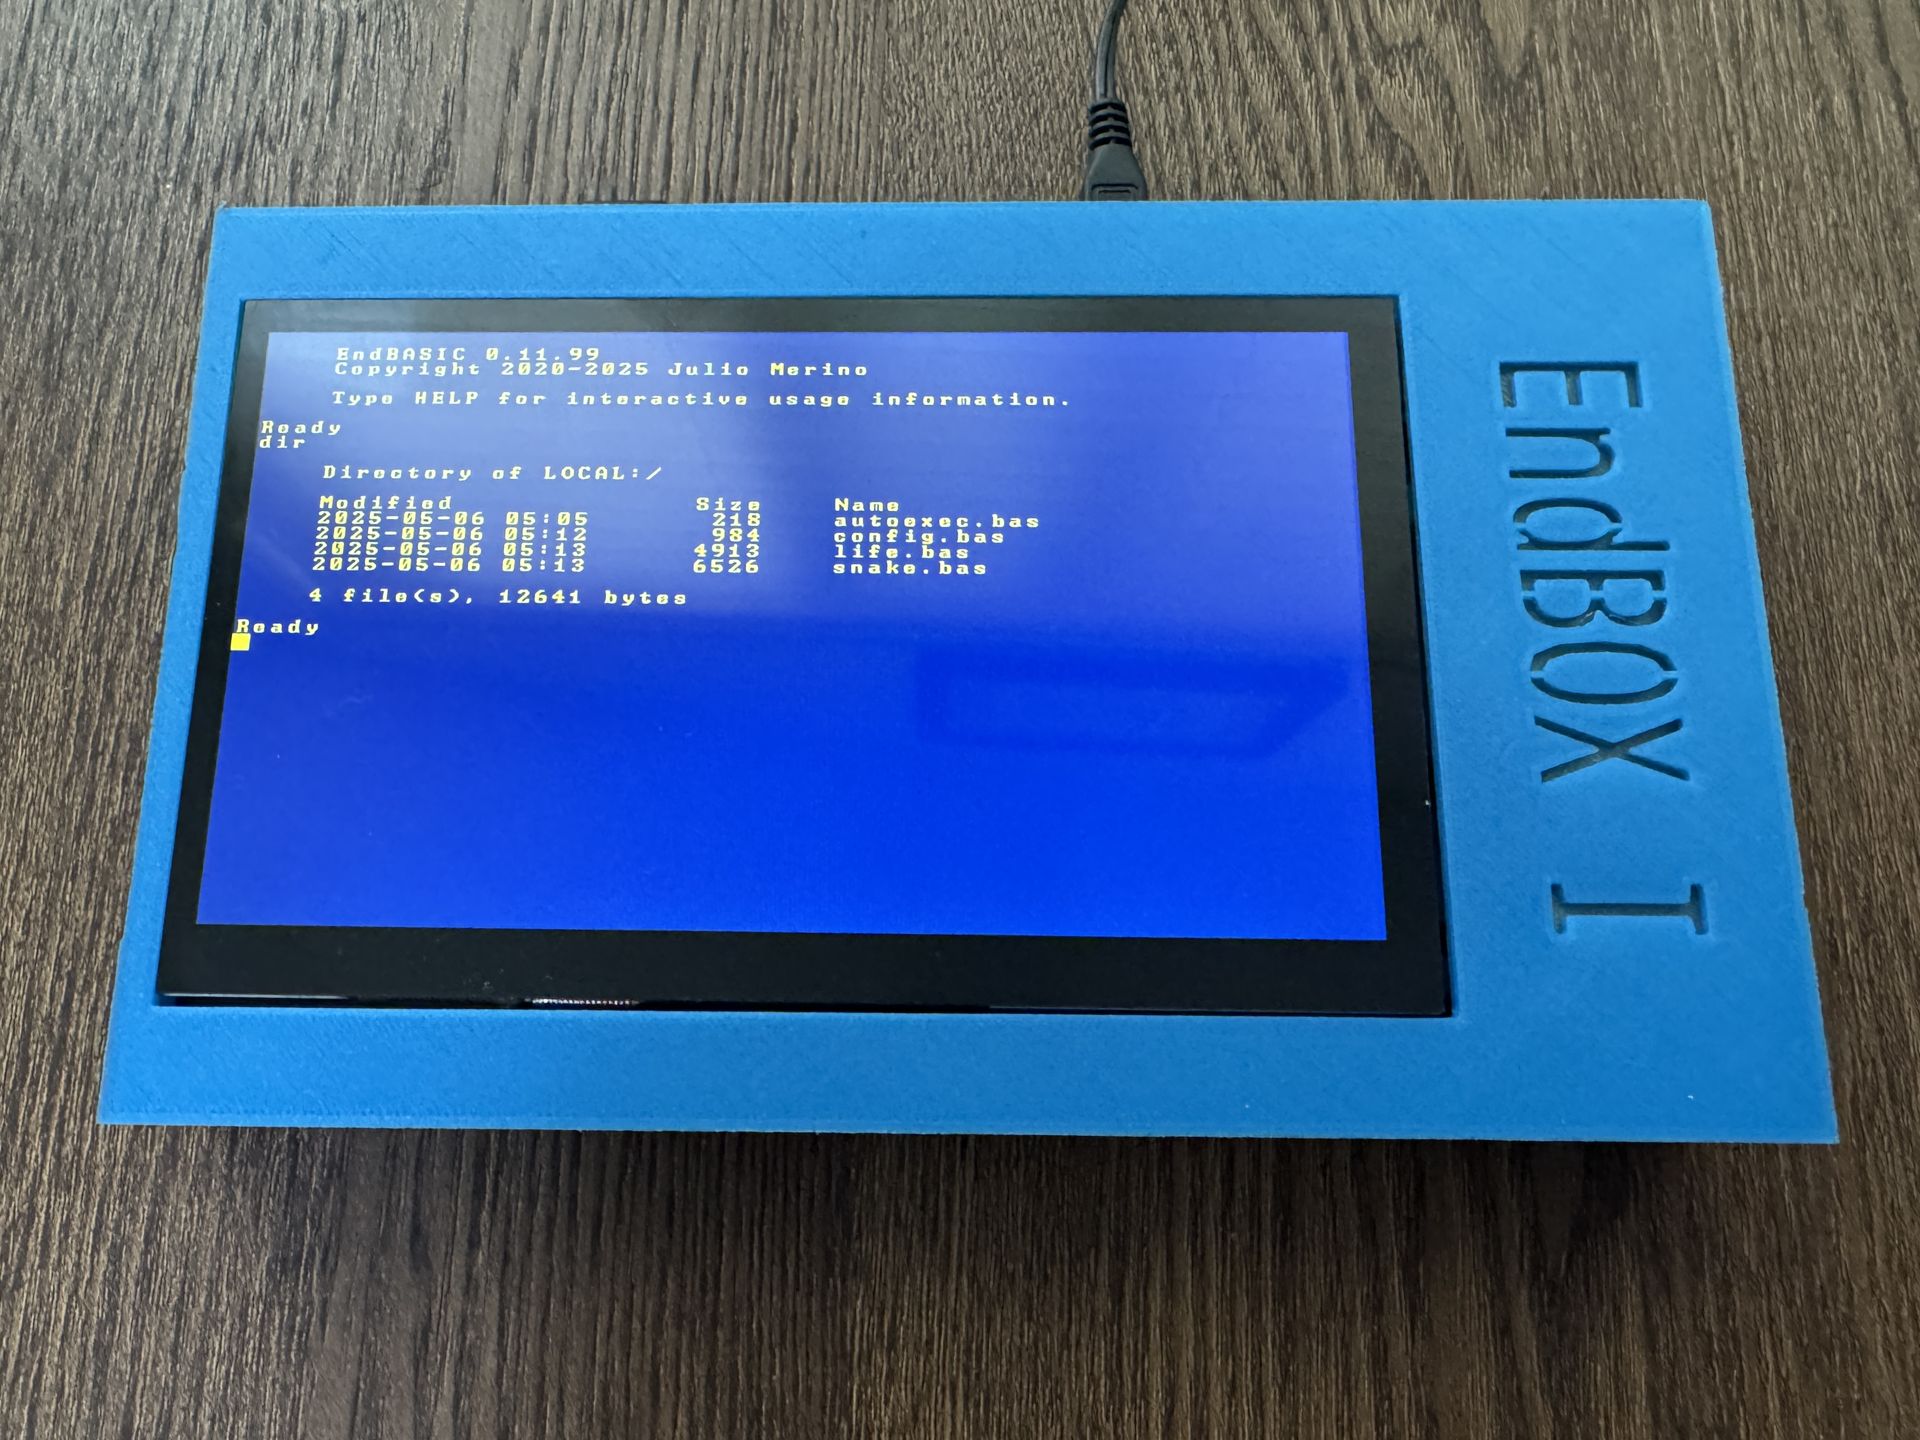
The EndBOX I is a tablet-like device with a full 7" 1024x600 HDMI display, USB and GPIO ports, and Ethernet and WiFi connectivity for optional cloud access.
You need the following parts for this build:
- Raspberry Pi 3 B+
- CanaKit 5V 2.5A Power Supply
- microSD card of at least 1 GB
- Micro USB splitter
- 1024x600 7-inch HDMI display
You can optionally replace the Raspberry Pi 3 B+ with the Pi Zero 2 WH listed in the micro model below.
As for the case, you can contact me and I might be able to get one 3D-printed and shipped to you. Details to be arranged.
The micro model
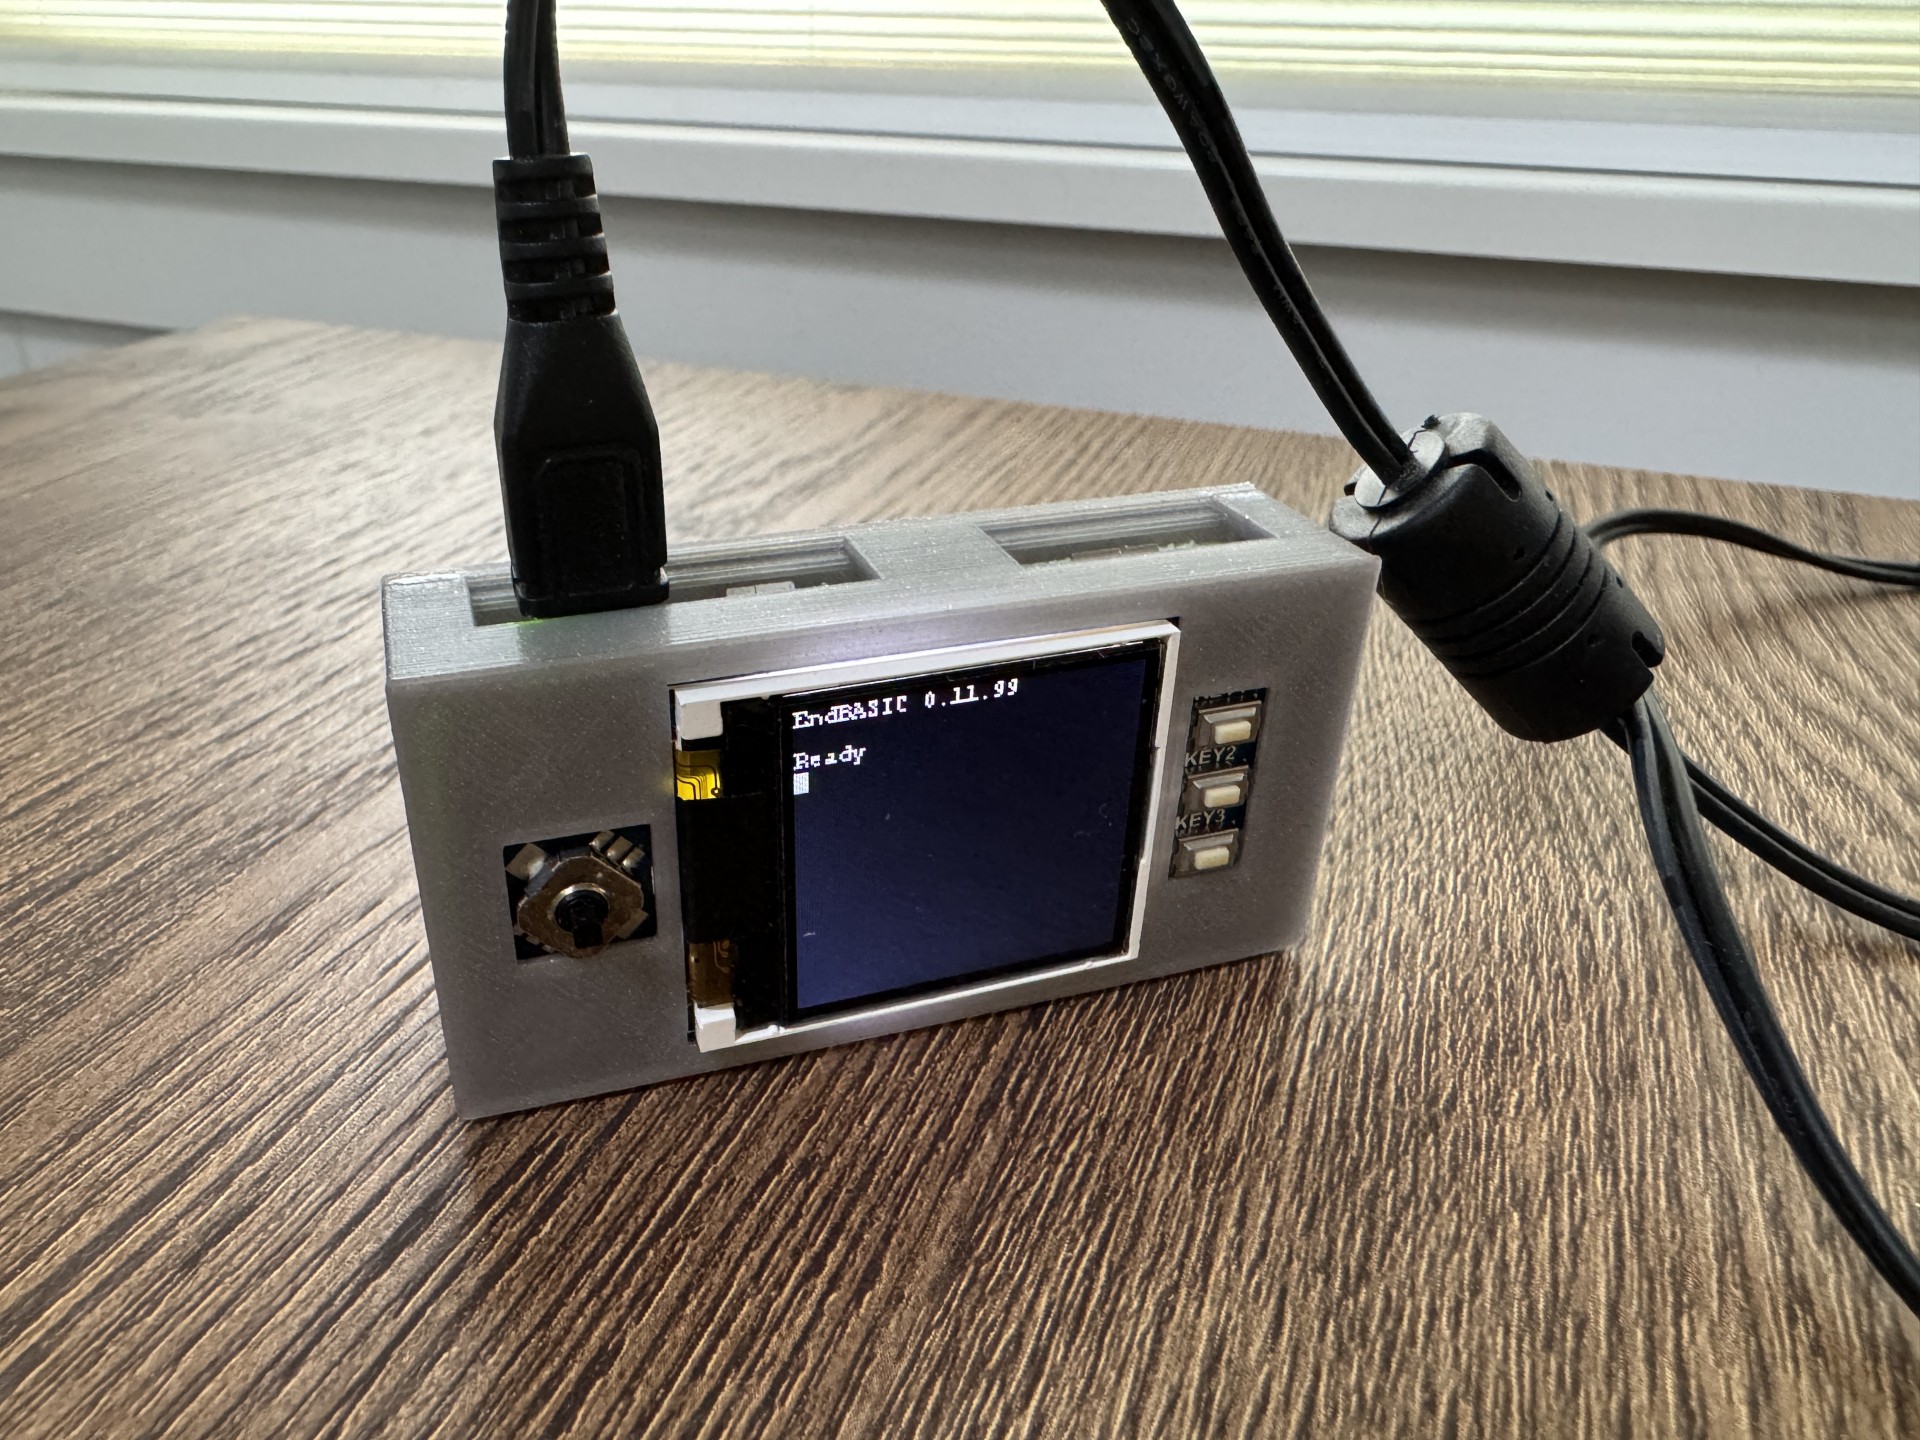
The EndBOX I Micro is a pocket-size device with an SPI-attached 1.44" 128x128 LCD display, a micro-USB port, and WiFi connectivity for optional cloud access.
You need the following parts for this build:
- Raspberry Pi Zero 2 WH (WiFi + pre-soldered GPIO headers!)
- CanaKit 5V 2.5A Power Supply
- microSD card of at least 1 GB
- waveshare 1.44inch LCD Display HAT 128x128
- Micro USB to USB A adapter (optional)
- Mini HDMI to HDMI adapter (optional)
As for the case, you can contact me and I might be able to get one 3D-printed and shipped to you. Details to be arranged.
Preparing the EndBOX OS disk image
First of all:
Download the EndBOX OS evbarm-aarch64 image
One you have the image, perform the following steps depending on your host system.
Windows
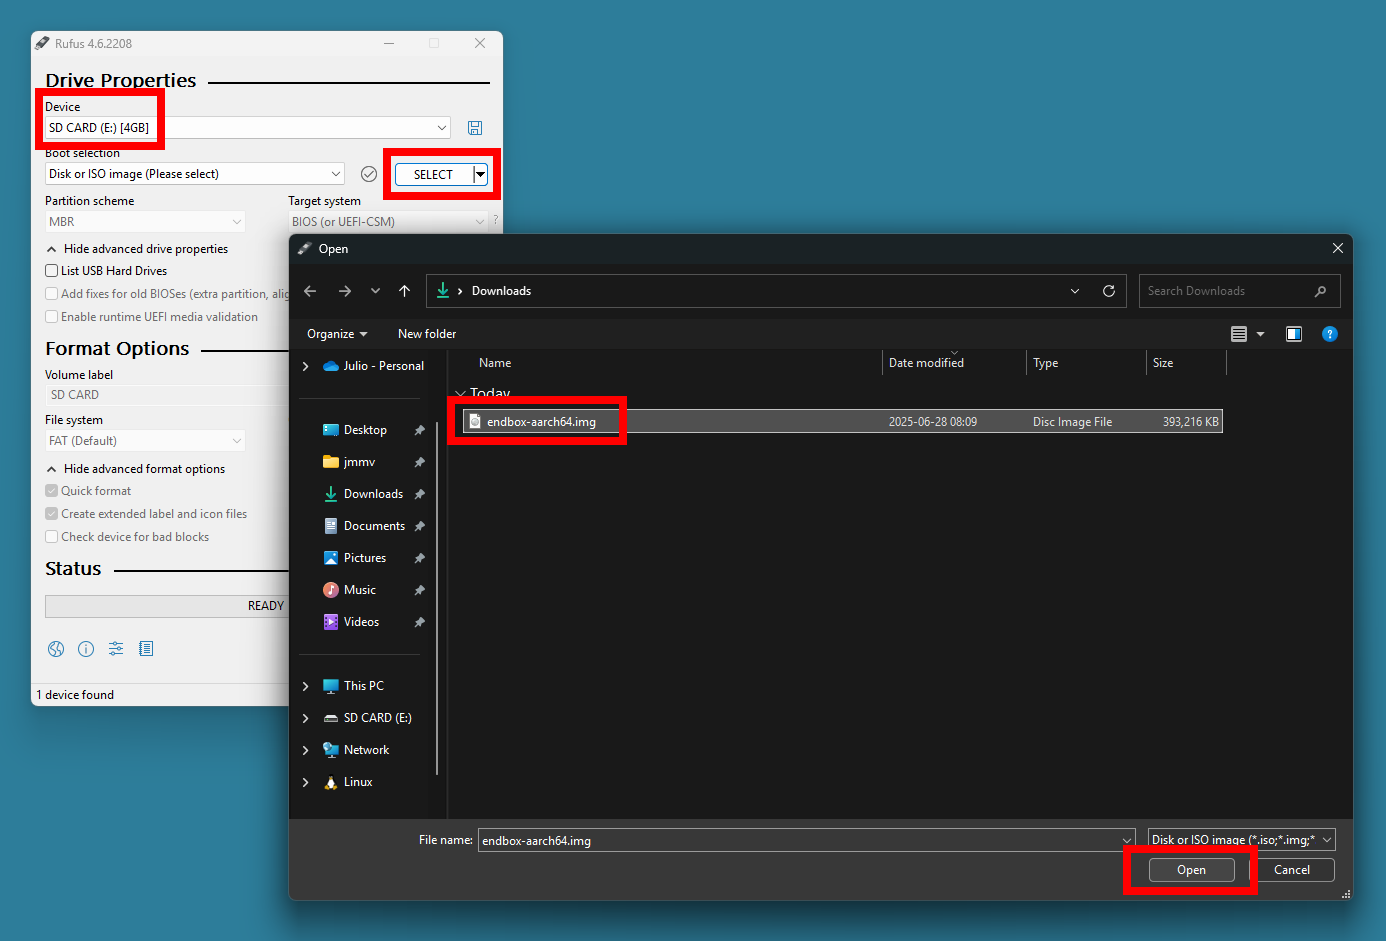
Use Rufus to write the EndBOX OS disk image to the microSD card. Once you have downloaded and installed Rufus, insert the microSD card into your computer, launch Rufus, and:
- Select the microSD card from the Device dropdown menu.
- Click SELECT and locate the EndBOX OS disk image you downloaded earlier.
- Click START and wait for the process to complete.
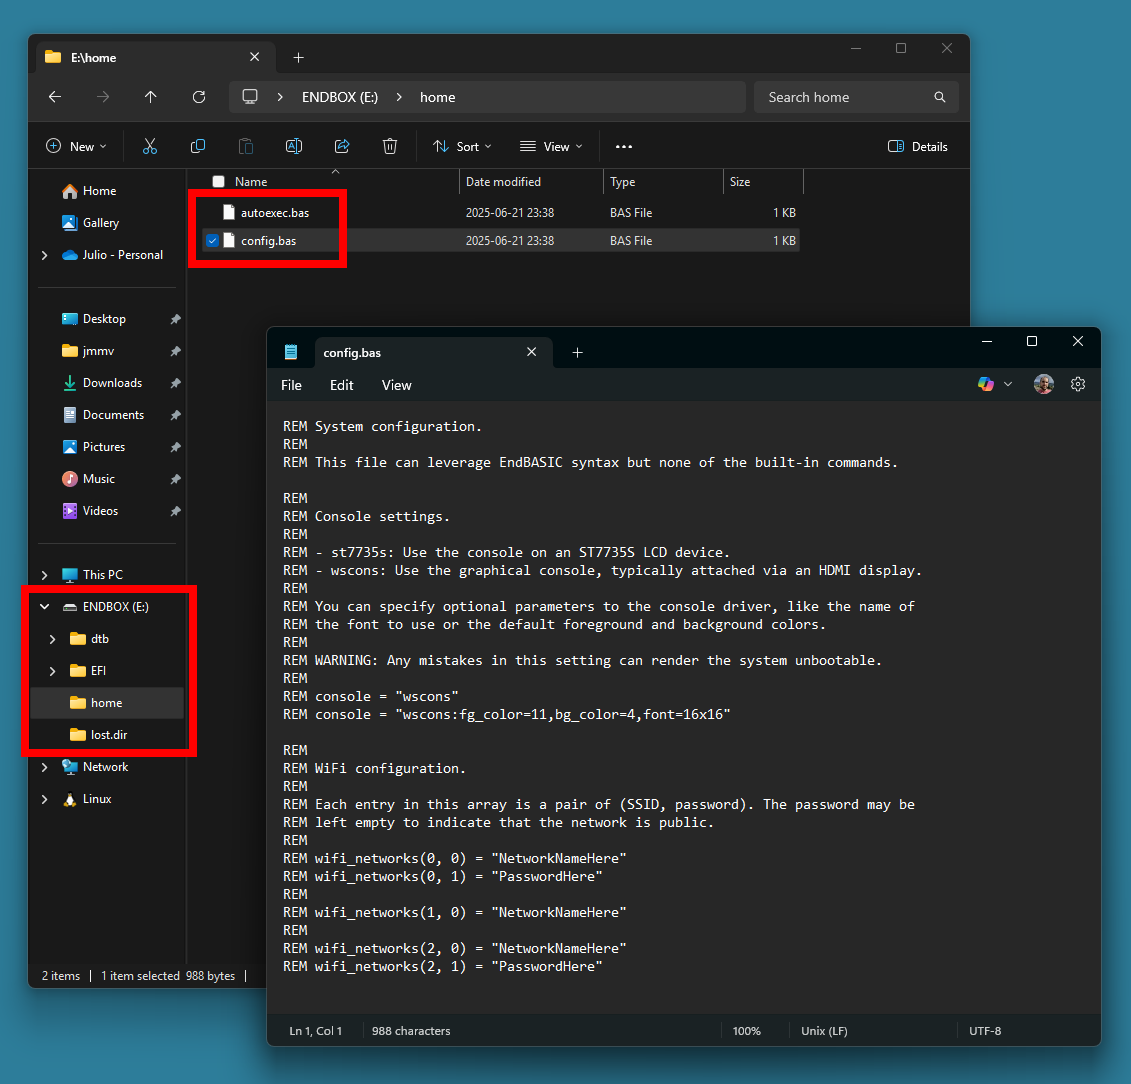
After writing the image, Windows will auto-mount the boot partition of the device as a drive with the label ENDBOX. If you open the drive in Explorer, you should see something like this:
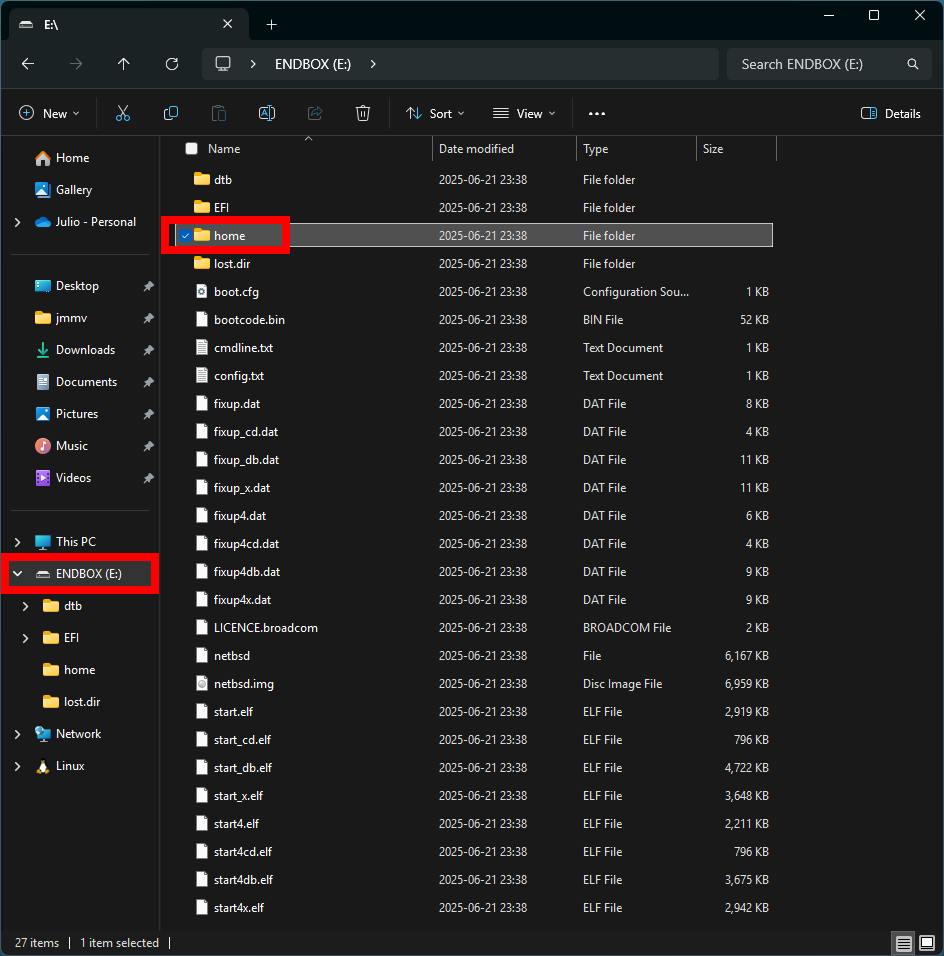
Within the ENDBOX drive, you will find a home directory where you can tweak configuration files before the first boot. See the System configuration section below for details. This directory will also contain any .BAS files you create from within EndBASIC.
macOS
Writing the image on macOS requires using the command line because the Disk Utility does not recognize the raw disk image format.
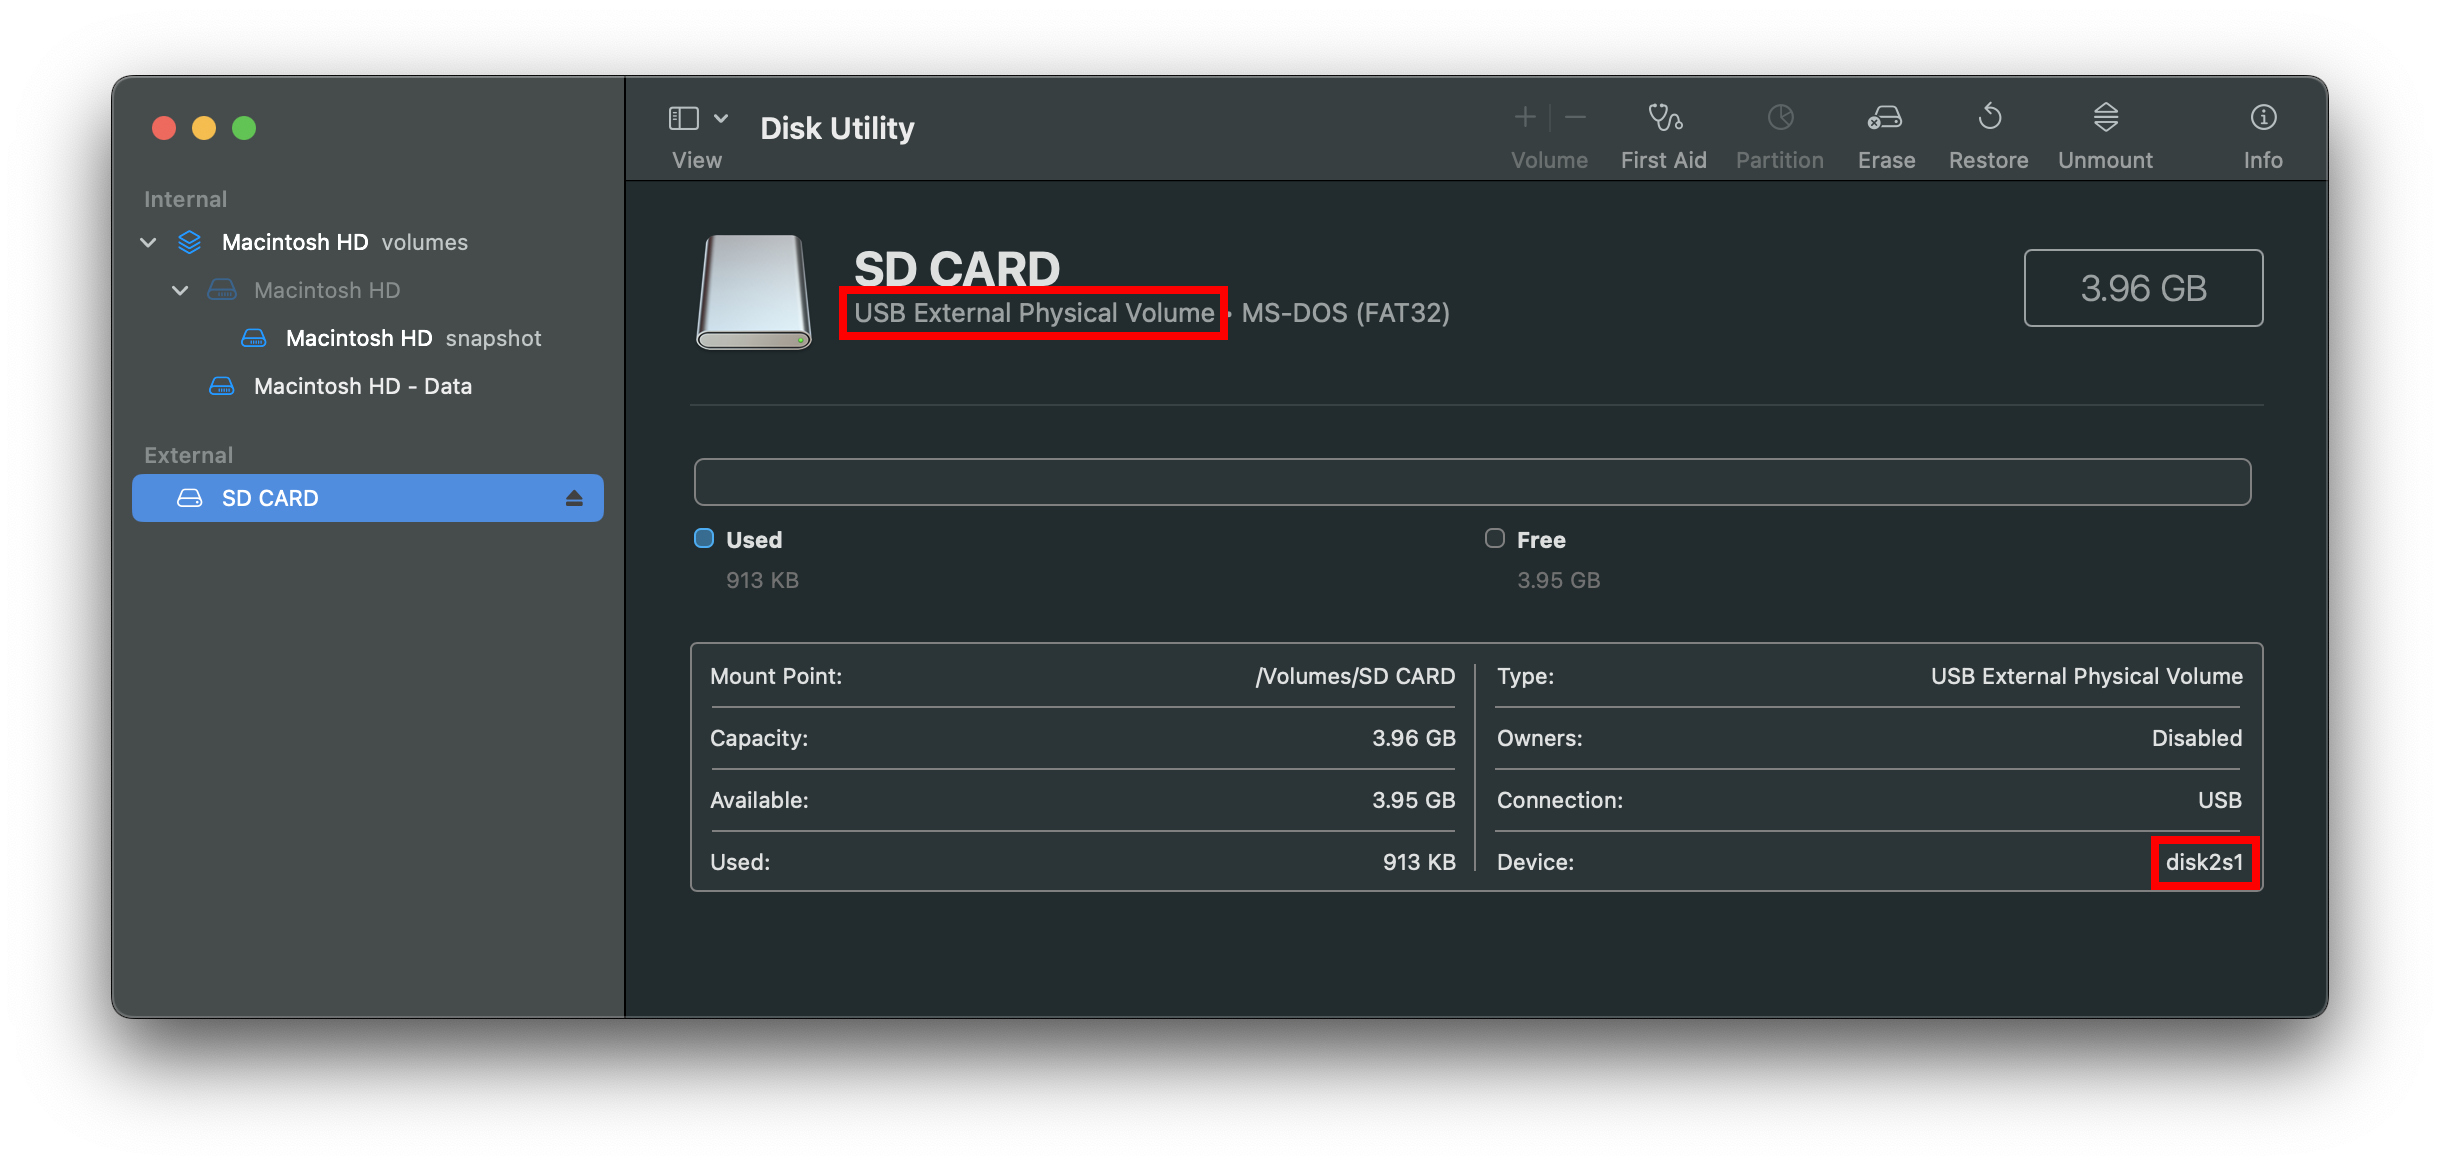
First, insert the microSD card and open the Disk Utility application to find the name of the disk. If you select the disk, the device name you’ll see is what you need to use; if you select a volume within the disk, you will need to strip its “slice number”. For example, the screenshot below shows that I selected a volume and that its name is disk2s1, so the corresponding disk is disk2.
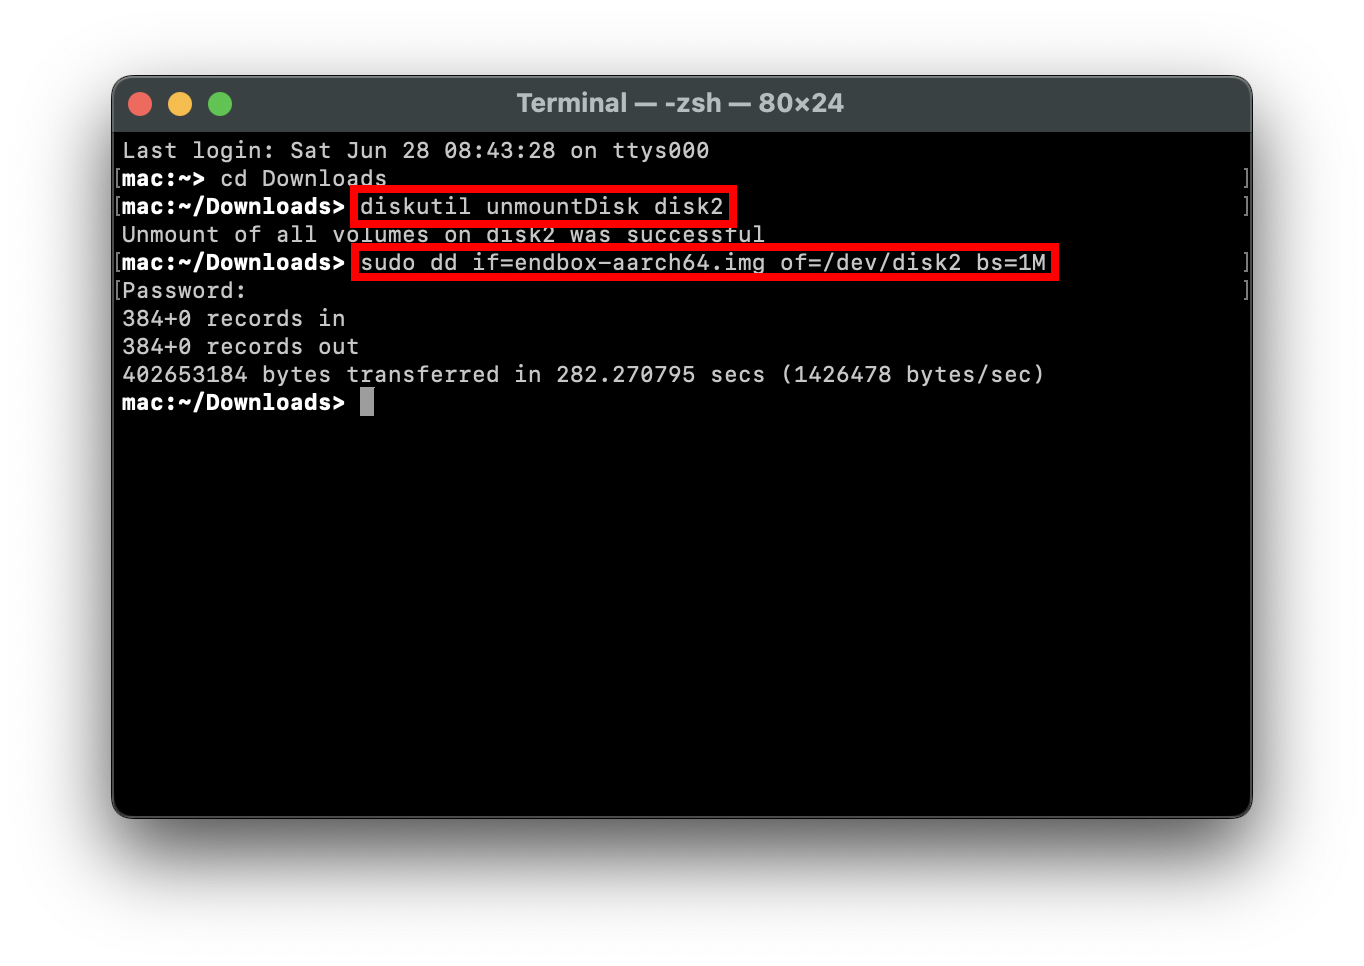
Second, unmount all volumes from the disk so that you can write to it. You can do this from Disk Utility or by running sudo diskutil unmountDisk /dev/diskN in the Terminal, replacing diskN with the name you found above.
Third, write the image to the disk using dd. In a Terminal, run: sudo dd if=path/to/endbox-os.img of=/dev/rdiskN bs=1m. Replace diskN with the disk name you found before. The dd command will not show any progress, so be patient.
WARNING: This command is very dangerous. If you specify the wrong of= parameter, you will lose data.
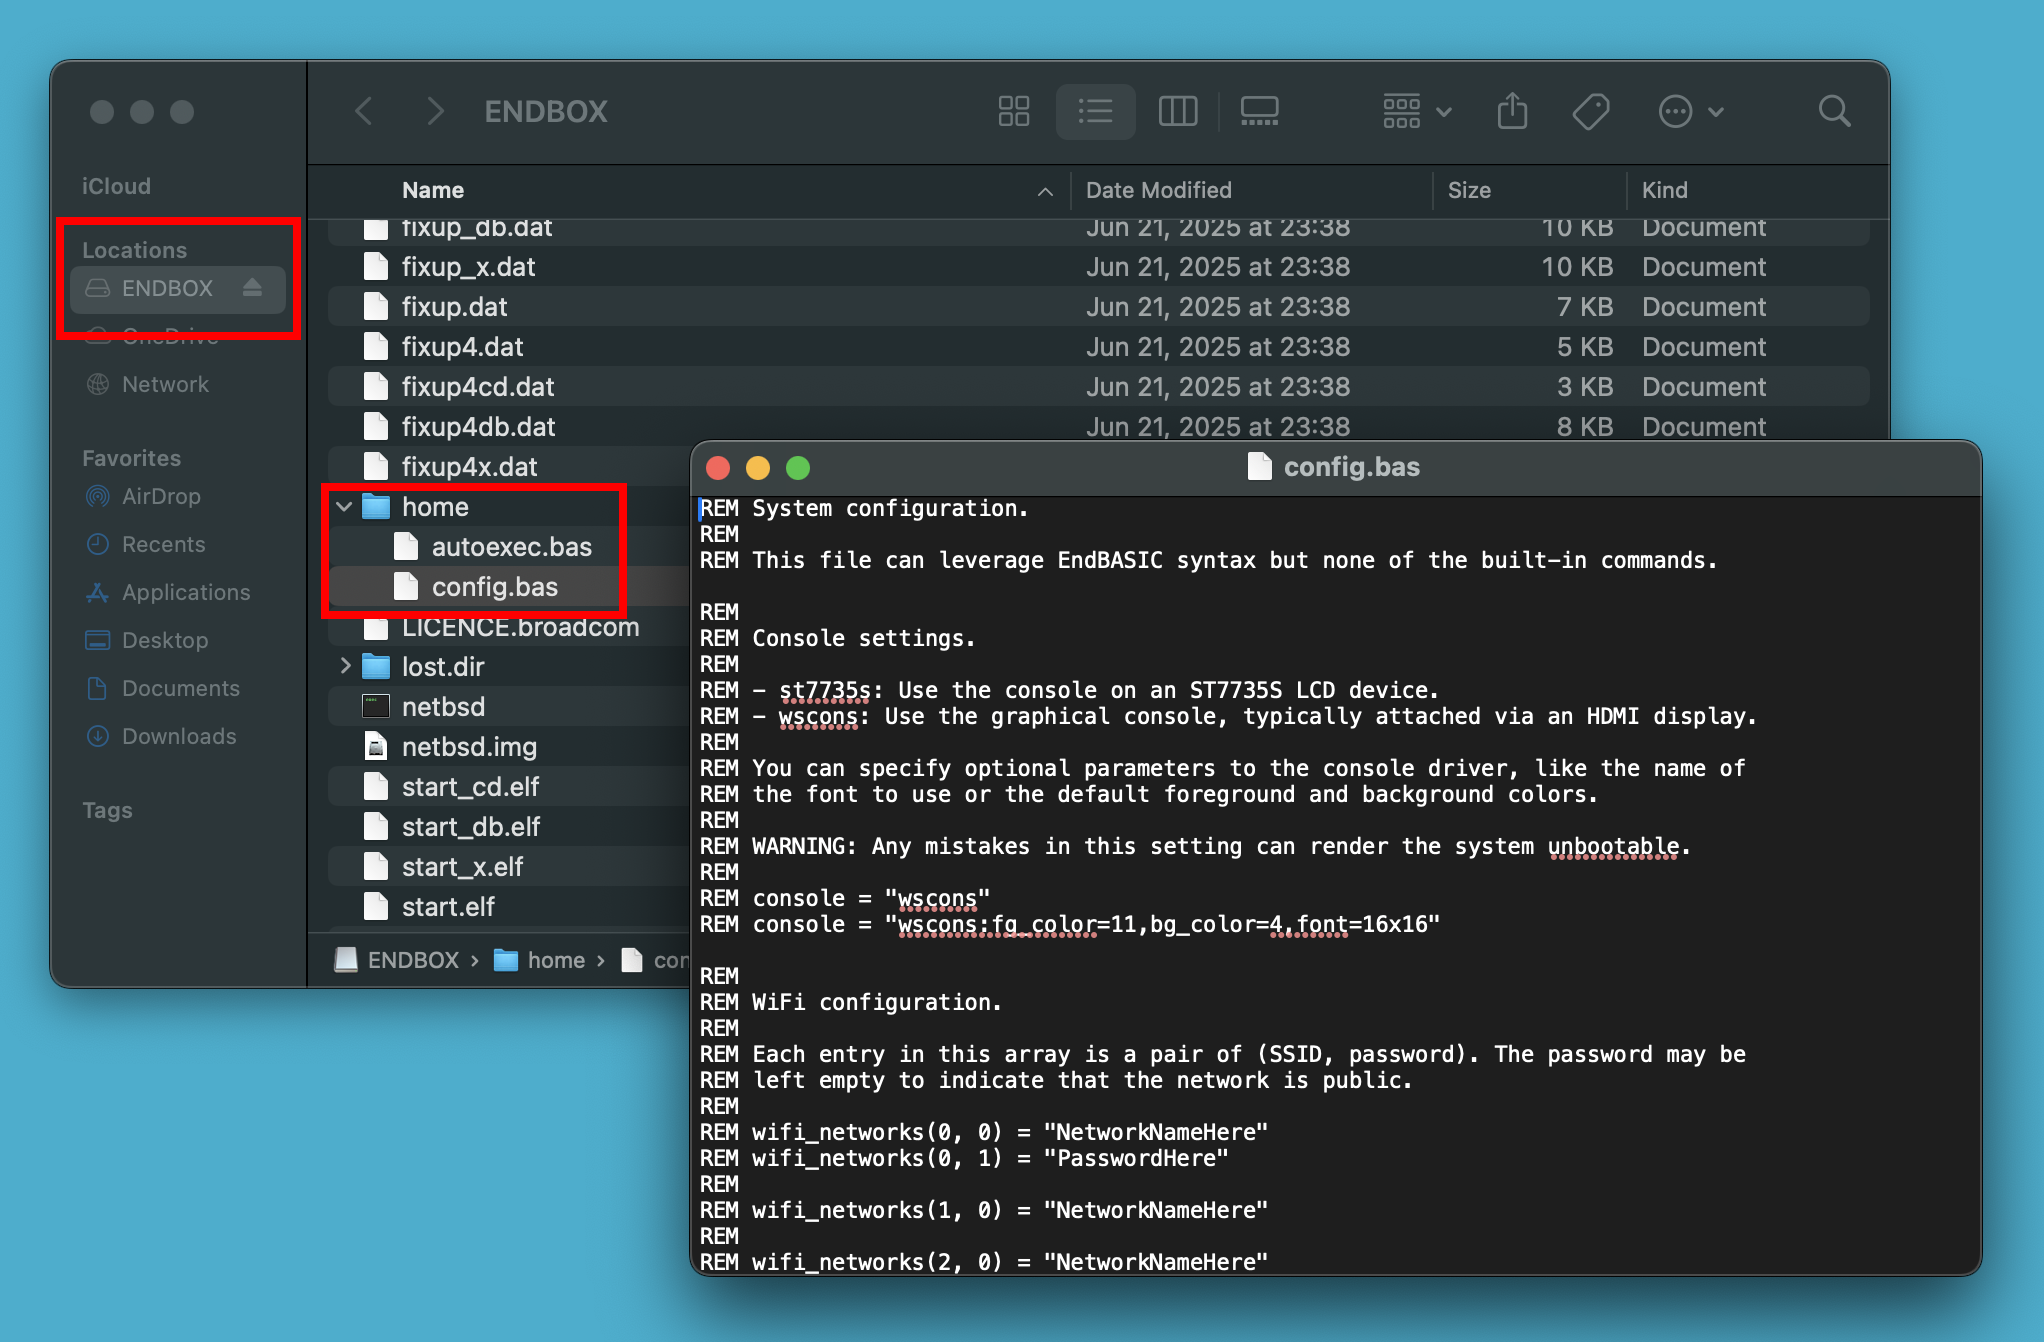
Finally, once dd completes, you can remove and reinsert the microSD card. The disk will mount automatically and you will be able to tweak configuration files inside the home directory. See the System configuration section below for details. This directory will also contain any .BAS files you create from within EndBASIC.
Linux, BSDs, and more
The process on Linux and BSDs is analogous to the one on macOS.
First, find the device name for your microSD card. You can typically do this by inspecting the output of dmesg after you plug the card in or by looking at the output of lsblk on Linux.
Second, make sure the device is unmounted. For example, if the card is /dev/sdc and it was automounted as /dev/sdc1, run sudo umount /dev/sdc1.
Third, write the image using dd: sudo dd if=path/to/endbox-os.img of=/dev/sdN bs=1M.
WARNING: This command is very dangerous. If you specify the wrong of= parameter, you will lose data.
Finally, once dd completes, you can mount the first partition on the device to access the home directory and tweak configuration files. See the System configuration section below for details.
System configuration
The EndBOX OS reads two configuration files during startup:
LOCAL:/CONFIG.BAS: Sets system configuration properties. These include details on which console to use and which WiFi networks to connect to.LOCAL:/AUTOEXEC.BAS: Commands to run once the system is up.
Both of these files can be edited from within the EndBOX, but they can also be edited from the system you use to write the SD card—including Windows and macOS machines. You’ll find these files under the home directory, and you can choose to edit them before EndBOX’s first boot to customize settings.
CONFIG.BAS: Console configuration
The console string variable specifies which console device to use and any optional parameters you may want to pass to configure the device.
Here are some examples:
console = "wscons": Configures the graphical console on the HDMI output. This is the default setting.console = "wscons:fg_color=11,bg_color=4,font=16x16": Configures the graphical console on the HDMI output and changes the default color scheme to be yellow-on-blue and the font to be larger. This makes the console look like the one in the Amstrad CPC 6128.console = "st7735s": Configures the graphical console on the ST7735S 1.44" LCD display. You need to set this value for the EndBOX I Micro build.
Beware that any mistakes in this configuration setting could render the system unusable. Should that happen, attach the SD card to your desktop or laptop and modify the CONFIG.BAS file from there to restore service.
CONFIG.BAS: Keyboard configuration
The kbd_encoding string variable specifies the keyboard layout for the console. The default is us but you can specify other country codes like es to adjust the layout to your hardware.
Additionally, you can apply individual key overrides via the kbd_keycodes array. For example, if you wanted to remap keycode 15 (the default keycode for the Tab key in a US keyboard) to the Escape key, you could do:
kbd_keycodes(15) = "Cmd_Debugger Escape"
For more details on the values that these settings can take, please refer to the wskbd(4) manual page.
CONFIG.BAS: WiFi networks
The wifi_networks array determines which WiFi networks are available for connection. You’ll need to set this up if you want to use cloud-based file sharing.
Each entry in wifi_networks is a pair of the network’s SSID name and the password. If the password is left unset, then the network is assumed to not require authentication.
Here is an example of how to configure both a public and a private network:
wifi_networks(0, 0) = "public network name"

wifi_networks(1, 0) = "private network name"
wifi_networks(1, 1) = "the password"
WiFi networks with captive login portals are not supported.
AUTOEXEC.BAS: Autorun
If you are building an “appliance-like” device intended to run just one EndBASIC program, you can leverage AUTOEXEC.BAS to do so: simply add RUN "THE-PROGRAM.BAS" at the end of the file to automatically launch such program.
Backing up your data
To back up any programs you create on an EndBOX device, you have two choices.
The first and easiest option is to leverage the cloud file sharing service, which requires setting up WiFi access as described earlier. When the WiFi is configured, you can simply save your programs to the CLOUD: drive and they will be off-device.
The second option is to attach the SD card to your desktop or laptop machine. Any files you have to the LOCAL: drive within the EndBOX will be available in the home directory of the SD card.
What about x86?
If you have made it this far and are wondering if you can run the EndBOX OS on an Intel/AMD x86-64 machine, well, you can! There is a build that should work on most hardware, although this is only generally tested within QEMU.
If you want to try it out:
Download the EndBOX OS amd64 image
Then follow similar steps to the ones above to write the image to a USB stick and… figure out how to get your BIOS/EFI to boot from it.
Telemetry
If connected to the Internet, the EndBOX OS generates a unique and random identifier for the system and emits a few anonymous metrics. These are:
- The EndBOX OS release in use.
- The architecture of the machine.
- The console subsystem selected in
CONFIG.BAS. - A periodic ping to calculate uptime.
